DIY Encaustic Wax Art: Painting with Molten Beeswax
Making things with your own hands satisfies a fundamental human need. Encaustic Wax Art combines creativity with practical skill, producing results that carry personal meaning no purchased item can match. The process teaches patience, problem-solving, and the value of careful work. Begin by gathering quality materials; inferior inputs produce inferior results regardless of skill level. Read through all instructions before starting, visualizing each step and identifying potential challenges. Prepare your workspace with adequate lighting, ventilation, and tool access. Clear interruptions during work sessions; focused attention produces better results than rushed, distracted efforts. Start with simpler variations before attempting complex designs. Master basic techniques through practice, building muscle memory that enables more ambitious projects. Do not fear mistakes; they teach more than successes and often lead to creative innovations.
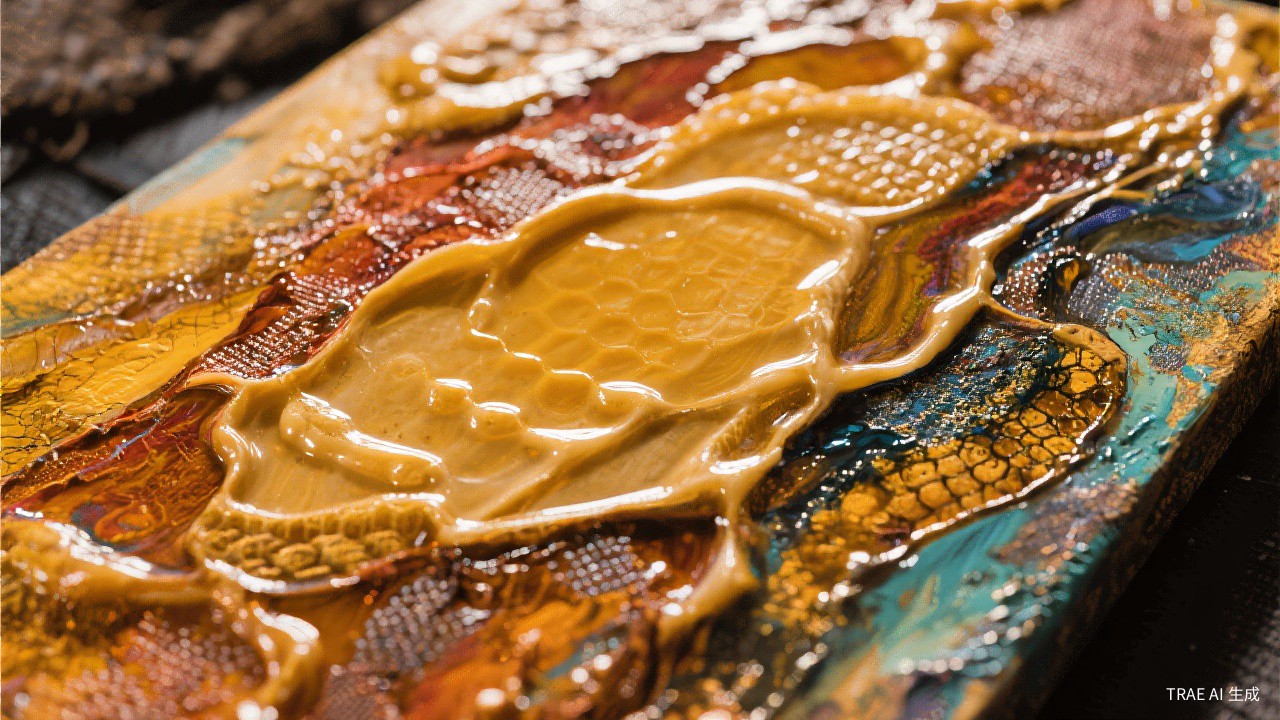
Final Details
Surface Treatments
Proper finishing protects Encaustic Wax Art and enhances appearance. Sand thoroughly between coats for smooth results. Choose finishes appropriate for the intended use and environment. Test finishes on scrap material before applying to your project. Apply in well-ventilated areas with appropriate safety equipment. Allow adequate drying time between coats; rushing creates tacky, uneven results. Buff final coats for professional sheen. Maintain finished items properly, cleaning and reapplying protective coatings as needed. The finish is what people see and touch; give it appropriate attention.
Personalization Options
Make Encaustic Wax Art truly yours through thoughtful customization. Add decorative elements that reflect your style and preferences. Incorporate colors that complement your existing decor. Consider functional modifications that improve usability for your specific needs. Sign or date your work, marking it as uniquely yours. Document customizations for future reference or replication. Share your modifications with maker communities, contributing to collective knowledge. Embrace imperfections that give handmade items character and charm. Personal touches transform generic projects into meaningful possessions.
Hardware and Details
Hardware selection completes Encaustic Wax Art with functional elegance. Choose hinges, handles, and fasteners that support intended use while contributing to overall aesthetics. Test hardware operation before final installation. Adjust alignment for smooth function. Consider how hardware feels in use, not just how it looks. Quality hardware outlasts cheap alternatives and operates more smoothly. Sometimes simple hardware allows craftsmanship to shine; other times decorative hardware provides needed ornamentation. Match hardware finish to other elements in the piece or room for cohesive appearance.
Construction Process
Assembly Techniques
Methodical assembly ensures Encaustic Wax Art success. Read all instructions completely before starting. Lay out materials and verify you have everything needed. Work in a logical sequence, allowing adequate drying or curing time between steps. Check squareness and level frequently; small errors compound over multiple steps. Clamp pieces before fastening to ensure proper alignment. Pre-drill holes to prevent splitting wood or cracking other materials. Test fit before applying permanent adhesives or fasteners. Step back periodically to assess overall progress and appearance. Patience during assembly creates better results than rushing to completion.
Quality Control
Attention to detail elevates Encaustic Wax Art from amateur to professional. Check measurements twice before cutting. Sand surfaces progressively from coarse to fine grits for smooth finishes. Fill gaps and imperfections before final finishing. Test moving parts for smooth operation. Verify structural integrity before considering projects complete. Clean all surfaces thoroughly before applying finishes. Apply multiple thin coats rather than single thick ones for better coverage and durability. Inspect finished work critically, addressing any issues while still correctable. High standards during construction eliminate disappointment later.
Problem Solving
Challenges arise during most Encaustic Wax Art projects; problem-solving separates successful makers from frustrated quitters. When mistakes happen, stop and assess before reacting. Many errors can be corrected or disguised with creative thinking. Keep scrap materials for testing fixes before applying to visible areas. Consult online resources or experienced makers when facing unfamiliar problems. Sometimes walking away briefly provides fresh perspective. Document solutions for future reference. Each problem solved builds confidence and capability for the next challenge.
Care and Maintenance
Cleaning Guidelines
Proper cleaning preserves Encaustic Wax Art appearance and function. Dust regularly with soft cloths to prevent buildup. Use appropriate cleaners for your specific materials; what works for wood damages metal or fabric. Avoid excessive moisture on items not designed for wet cleaning. Address spills immediately to prevent staining. Polish metal components periodically to maintain luster. Clean glass and mirrors with appropriate products for streak-free results. Regular gentle cleaning prevents the need for harsh restoration later.
Repair Techniques
Even well-made Encaustic Wax Art items occasionally need repair. Address minor damage promptly before it worsens. Keep leftover materials from original construction for matching repairs. Learn basic repair techniques appropriate to your materials. Document original construction methods to guide repairs. Sometimes repairs add character; other times they should be invisible. Know when to attempt repairs yourself and when to consult professionals. Proper repair extends item lifespan and maintains functionality.
Long-term Storage
Storing Encaustic Wax Art items properly preserves them during periods of non-use. Clean thoroughly before storage to prevent pest attraction and material degradation. Store in climate-controlled environments when possible to prevent warping, cracking, or mold. Use appropriate covers that breathe rather than trap moisture. improve stored items to prevent contact with damp floors. Check stored items periodically for developing problems. Proper storage ensures your creations remain beautiful and functional for years of continued use.